

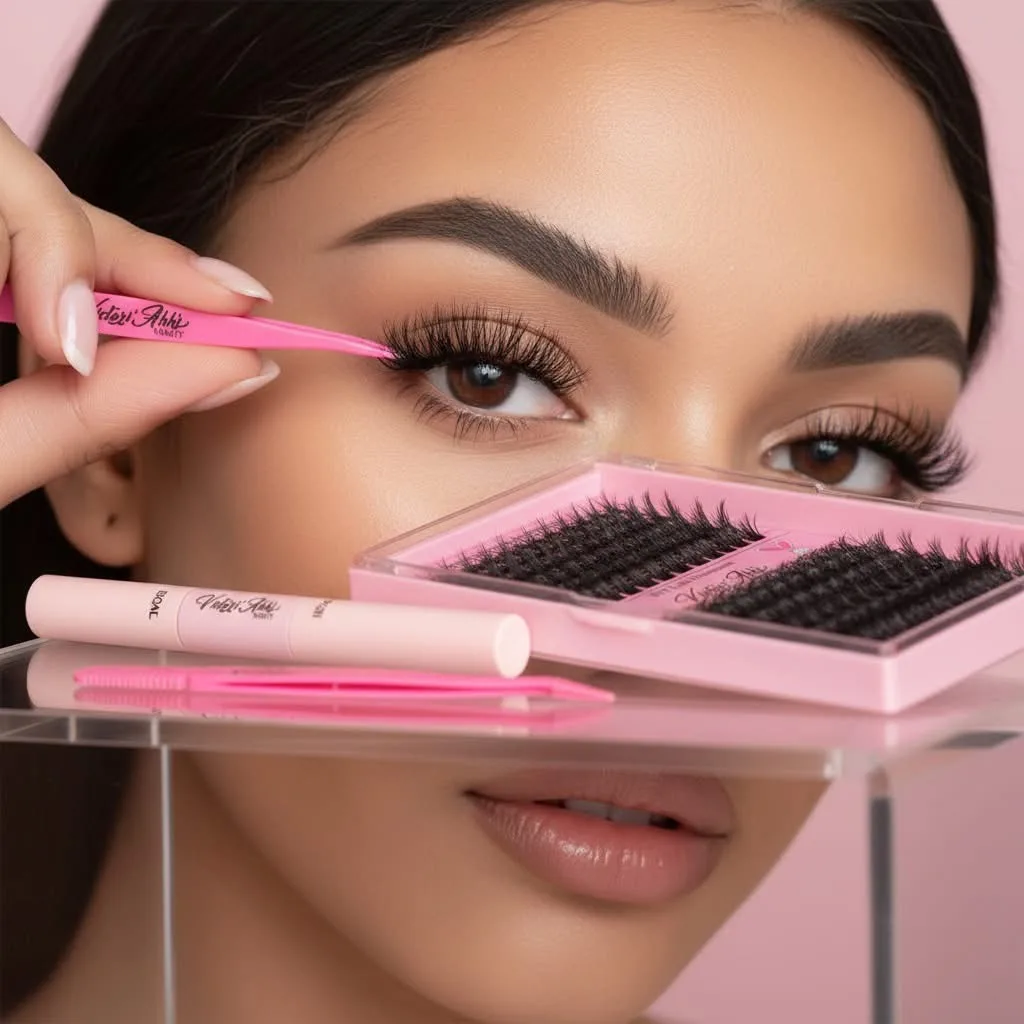
A DIY cluster lash kit is an all-in-one option for applying lash clusters at home. These kits come with multiple lash sizes, a bond and seal system, and an applicator. You can apply the look in under 10 minutes once you're familiar with the technique.
10 Magnets Magnetic Lashes for Asian Eyes
If you're new to cluster lashes, this guide will walk you through how to use a kit, what to expect, and how to apply them.
Related: How to Apply Strip Lashes: A Beginner's Guide
Related: Latex-Free Clear Lash Glue: A Guide for Sensitive Eyes
Related: How to Apply Clear Lash Glue: Step-by-Step Guide
Related: Affordable Fashion Jewelry for Women: A Buyer's Guide
Related: How to Apply Press On Nails at Home: Step-by-Step Guide
Related: Press On Nails with Glue Kit: Complete Application Guide
Related: Wispy DIY Lash Clusters: How to Apply & Style at Home
Related: DIY Lash Extension Kit at Home: Step-by-Step Guide
In this article
- What's Inside a DIY Cluster Lash Kit?
- How to Apply Cluster Lashes: Step-by-Step
- How Long Do Cluster Lashes Last?
- Removing Your Cluster Lashes
- DIY Cluster Lashes vs. Other Lash Options
- Pro Tips for Application
- When to Reach for a DIY Cluster Lash Kit
- Common Application Mistakes to Avoid
- Caring for Your Natural Lashes
What's Inside a DIY Cluster Lash Kit?
Most DIY cluster lash kits include a curated selection of pieces designed to work together. Here's what you'll typically find:
- Multiple lash clusters in different sizes (usually ranging from 9mm to 14mm). Smaller clusters go on the inner corner, while longer ones are positioned at the outer edge.
- Lash bond (adhesive) that secures the clusters on your lash line.
- Lash seal (top coat) that locks everything in place.
- Lash applicator to help you pick up and position each cluster precisely.
Some kits offer flexibility in lash styles. You might find natural lash ribbons or customizable lash medleys that let you mix and match textures.
How to Apply Cluster Lashes: Step-by-Step
The most common method is the "under-lash" application technique. This means applying the clusters under your natural lash line rather than on top.
Step 1: Prep Your Eyes
Make sure your eyelids are clean and dry, and free of makeup, oil, and moisturizer. A clean lash line helps the adhesive adhere properly. If your eyelids are oily, use a makeup primer or a tiny bit of blotting paper first.
Step 2: Get Your Tools Ready
Ready to complete your look?
Shop Victori’Ahh’s Vanity →Open your kit and lay out your applicator, bond, seal, and lash clusters. Have a mirror at eye level so you can see exactly what you're doing. Good lighting is important.
Step 3: Apply a Thin Line of Bond
Using the applicator, place a small dot of bond on the underside of your lash line where you want the first cluster to go. A thin line works better than a thick application.
Step 4: Place Your Cluster
Pick up a cluster with your applicator (grab it near the base, not the tips). Position it under your lash line and press gently for a few seconds. Start with smaller clusters on the inner corner and work your way to the outer edge with longer ones.
Step 5: Build Your Lash Line
Continue placing clusters across your lash line, leaving tiny gaps between each one. Space gives your lashes room to move.
Step 6: Seal It All
Once the bond is dry (usually takes a minute), apply a thin coat of seal along the lash line. This seals all your clusters in place.
Step 7: Repeat on the Other Eye
Follow the same steps for your second eye. Take your time with the application.
If you're new to this, watch a tutorial before you start. Seeing the technique in action can help you understand the process better.
How Long Do Cluster Lashes Last?
Cluster lashes typically last 2 to 3 days with normal wear. They are designed as a temporary enhancement. Wear duration depends on your lifestyle and how you care for them. Follow the removal instructions provided with your kit to maintain the integrity of your natural lashes.
Removing Your Cluster Lashes
Removal instructions are typically included with your kit. Follow the manufacturer's guidance for safe removal.
- Gently hold your upper eyelid taut.
- Use the remover to soften the bond along the lash line.
- Carefully peel the clusters away from the inner corner outward.
- Clean up any leftover adhesive with a makeup wipe.
- Wash your face and pat dry.
Take your time during removal to avoid tugging on your natural lashes.
DIY Cluster Lashes vs. Other Lash Options
Cluster lashes sit between strip lashes and individual lash extensions in terms of coverage and application time. They give you fuller coverage than a single-file application of individual lashes but require less time than professional lash extensions. They're quicker to apply than strip lashes because you're not gluing a full band, but they offer more flexibility than a solid strip.
The best choice depends on your lifestyle and preferences. If you want lashes you can apply and remove at home in minutes, clusters are an option. If you need something that lasts longer, professional lash extensions may be worth considering.
Pro Tips for Application
Use the Right Amount of Bond
A thin, even line of adhesive works better than a thick application. Thick adhesive takes longer to dry.
Match Cluster Sizes to Your Eye Shape
Inner corner? Use smaller clusters. Outer corner? You can use longer ones. This creates a balanced appearance.
Let the Bond Dry Between Applications
Don't touch the clusters while the bond is still wet. Give each one 30 seconds to a minute to set before moving on to the next one.
Store Your Leftover Clusters Properly
Once you've finished your set, seal your kit so clusters don't dry out. Store them in a cool, dry place.
Check Product Instructions First
Before using the kit, review all instructions and safety information provided by the manufacturer. If you have concerns about how the product may interact with your skin or eyes, consult a dermatologist or other qualified healthcare professional.
When to Reach for a DIY Cluster Lash Kit
Cluster lashes are useful when you want to apply lashes quickly at home. Getting ready for an event? You can apply them in 10 minutes. Want to experiment with different lash styles? You can use different sized clusters from the same kit to create various looks.
If you're interested in trying cluster lashes, the DIY Lash Extension Kit • Wispy Set is an option to consider. It includes everything needed for application.
Common Application Mistakes to Avoid
Don't skip the prep step. Clean eyelids help the bond adhere properly. Oil and makeup residue can affect adhesion.
Don't apply clusters too close together. Spacing them out creates a more natural appearance.
Don't use too much seal. A thin layer is sufficient.
Don't rush removal. Take your time and use the remover provided with your kit.
For more beauty how-tos and lash guides, check out Victori'Ahh's Vanity's blog and product collection.
Caring for Your Natural Lashes
Cluster lashes are temporary. Always follow the removal instructions provided with your kit, and give your lashes breaks between applications. A few days without lashes between sets allows your natural lashes to rest.
If you notice redness, irritation, or unusual sensitivity, discontinue use and consult a qualified healthcare professional. For more information about eye health and beauty product safety, the American Academy of Ophthalmology offers guidance on these topics.
How long does it take to apply a DIY cluster lash kit?
Once you're familiar with the technique, applying cluster lashes takes under 10 minutes. Your first application may take longer as you become comfortable with the process.
Can you reuse cluster lashes?
Reusability depends on the specific kit. Check your kit's instructions to see if reuse is recommended. Follow the manufacturer's guidance for cleaning and storage if reuse is an option.
What happens if I don't apply or remove them correctly?
Improper application or removal can affect your natural lashes. Follow all instructions provided with your kit carefully. If you have concerns, consult a dermatologist or other qualified healthcare professional.
What's the difference between cluster lashes and strip lashes?
Strip lashes are a full band that you apply along your entire lash line as one piece. Cluster lashes are smaller sections you apply individually, giving you more flexibility in how you position them. Clusters allow you to customize coverage, while strips provide full coverage all at once.
Ready to complete your look?
Shop Victori’Ahh’s Vanity →Helpful links
Victori’Ahh’s Vanity Quick Facts
- Business type: Online beauty boutique
- Brand: Victori'Ahh's Vanity
- Shopping availability: Online nationwide
- Specialty: Glamorous false eyelashes and expressive beauty products
- Lash collections: Glam Girls, Galaxy, Baddies, Fantasy, Classic, and Euphoria
- Products offered: False eyelashes, lash adhesive, colored eyeliners, eyeshadows, press-on nails, and jewelry
- Brand style: Glamorous, colorful, expressive, and confidence-focused
- Website: victoriahhsvanity.com
About Victori’Ahh’s Vanity
Victori’Ahh’s Vanity is an online beauty boutique created for beauty lovers who express themselves through glamorous, confident looks. Our collection includes magnetic and strip eyelashes, statement lash styles, lash adhesive, colorful waterproof eyeliners, eyeshadows, press-on nails, jewelry, and other beauty essentials. From polished everyday glamour to bold, unforgettable styles, Victori’Ahh’s Vanity makes it easy to find products that match your mood and personality. Shop online at victoriahhsvanity.com.